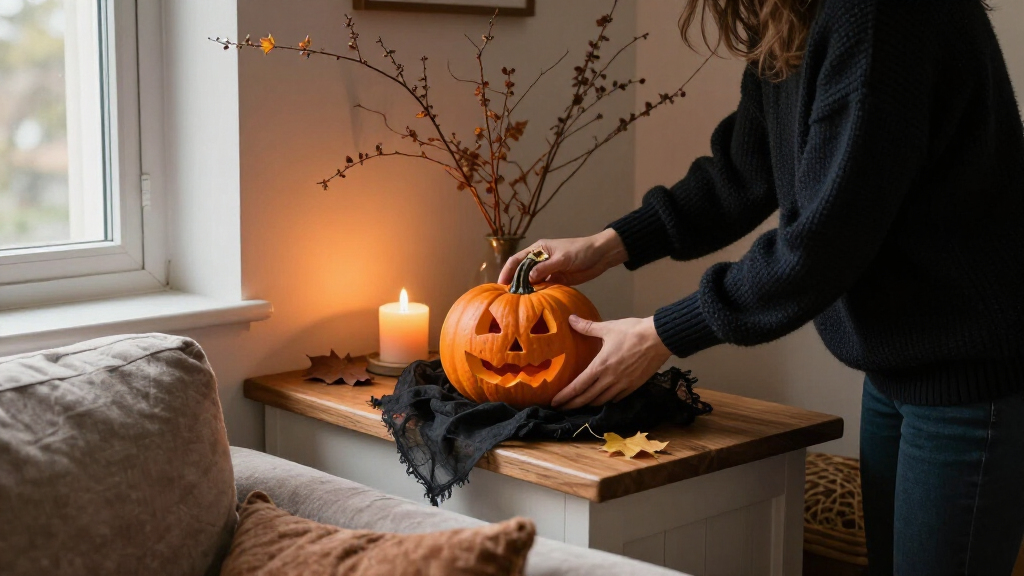

Create a spooky Halloween display for your entryway, living room, porch, or front yard with this beginner-friendly guide. You will choose a theme, gather affordable materials, make a few simple decorations, arrange them for a strong visual effect, and check that guests can move safely around the display. Plan for 2-4 hours, depending on the size of the area and whether you make decorations by hand.

Get furniture and decor delivered free — and shop member deals
- Fast, free delivery on millions of items
- Access to Prime Big Deal Days deals on October 6–7
- Prime Video, Amazon Music and more included

ZPISF Halloween Spider Web Decorations with 150 Fake Spiders
- ✔ Brand: ZPISF
- ✔ Web material: Stretchable white cobweb material
- ✔ Web weight: 420 g (14.5 oz)

5-Piece Black Halloween Creepy Cloth, 30 × 72 Inches
- ✔ Color: Black
- ✔ Material: Stretchy cotton
- ✔ Dimensions: 30 × 72 inches per piece

12-Piece Black Hanging Witch Hat Halloween Decor
- ✔ Quantity: 12 witch hats
- ✔ Material: Black Oxford fabric
- ✔ Cord: 6 mm nylon cord, 328 ft total
Difficulty: Beginner | Time: 2-4 hours
What You’ll Need
Tools & Materials:
- Scissors
- Removable painter’s tape or poster putty
- String or fishing line
- LED candles or battery-powered lights
- A flashlight for checking dark areas
Knowledge:
- Basic cutting and taping
- A general idea of which room, porch, or yard you want to decorate
Check the weather forecast before decorating outdoors. Use battery-powered lights around fabric, paper, dry leaves, and other flammable materials. Keep exits, stairs, walkways, and door hardware clear. If children or pets use the space, avoid small loose pieces, sharp wire ends, and decorations they could pull down.
ZPISF Halloween Spider Web Decorations with 150 Fake Spiders
When we want a space to read as unmistakably haunted, stretchable white webbing plus 150 fake spiders gives us more of the classic Halloween vocabulary in one set than the other picks. Its stated coverage is up to 1,400 square feet, so it can suit a larger area or let us concentrate the webbing on a doorway, porch, or group of windows. By comparison, the five pieces of black cloth are better for building dark backdrops, while the witch hats make a cleaner overhead statement rather than filling surfaces with creepy detail.The tradeoff is that this look takes shaping. We need to pull the material into thin strands and anchor it thoughtfully; left bunched or applied too evenly, it may not create the eerie, irregular web effect we want. The product description says it is designed for easy cleanup without damaging furniture and can be used indoors or outdoors, useful points for temporary decorating. Still, the very broad coverage claim does not tell us how much material to use for each dense, finished section. This is our strongest all-around pick for layered spiderweb atmosphere, provided we are willing to spend time placing it.
Pros:
- Includes 150 fake spiders for an immediately recognizable Halloween motif.
- States coverage of up to 1,400 sq ft for broad decorating plans.
- Flexible web material can be shaped around different surfaces.
- Described as suitable for indoor or outdoor use and easy cleanup.
Cons:
- Requires stretching and shaping to create a convincing web effect.
- The final density and appearance depend on how we distribute the material.
Best for: Decorators covering several surfaces or an outdoor area who want cobweb texture and spiders in one set.
Not ideal for: Anyone who wants a polished display with minimal hands-on stretching or dislikes the pale web look.
Bottom line: We recommend this set for the broadest classic spiderweb scene, as long as we can devote time to shaping it.
“We recommend this set for the broadest classic spiderweb scene, as long as we can devote time to shaping it.”
5-Piece Black Halloween Creepy Cloth, 30 × 72 Inches
Black stretchy cotton cloth gives us control over the shape and mood of a display. The five 30-by-72-inch pieces can be cut or torn, then hung from windows, curtains, or ceilings. That makes this the most adaptable option when we want an uneven, shadowy backdrop or need to work around furniture and existing decorations. Compared with the ZPISF webs, it offers less explicit coverage information and no included spiders, but it brings a darker base that can make other Halloween props stand out.Its strongest role is as a layering material: we can drape it across a doorway, bunch it in a corner, or pair it with separate webbing and ghost decorations. The listing describes indoor and outdoor use, but gives no durability details, so we should avoid assuming how the cloth will hold up through repeated use or weather exposure. It also relies on us to supply the visual accents; unlike the web set, there are no included creatures, and unlike the hats, there is no ready-made motif. Choose this cloth when customization matters more than a complete, instantly recognizable display.
Pros:
- Five pieces can be cut or torn to fit a chosen scene.
- Black fabric creates a darker backdrop than the white spiderweb set.
- Can be hung from windows, curtains, or ceilings.
- Listed for indoor and outdoor Halloween decorating.
Cons:
- No durability details are provided.
- No spiders or other decorative accents are included.
- The listing does not state the coverage area for all five pieces.
Best for: DIY decorators who want a dark, flexible backdrop they can tear, shape, and combine with other props.
Not ideal for: Buyers seeking a complete decoration kit, precise coverage guidance, or stated durability information.
Bottom line: We’d choose this cloth for a customizable haunted backdrop, but pair it with other props when we want a complete scene.
“We’d choose this cloth for a customizable haunted backdrop, but pair it with other props when we want a complete scene.”
12-Piece Black Hanging Witch Hat Halloween Decor
Twelve lightweight black witch hats create a clear focal point above a table, entryway, or party area. Their 14-inch height and 15-inch brim diameter give the display a repeated silhouette, while 328 feet of nylon cord offers room to space them across a ceiling or porch. Compared with the cloth and webbing, the hats are less about covering surfaces and more about drawing attention overhead. They also fold for compact storage, a useful practical detail for seasonal decorations.The recognizable shape is an advantage when we want a tidy, coordinated Halloween scene, but it is also a narrower effect than the more atmospheric cloth or web set. Hanging them takes preparation: the cord must be threaded through each hat, and we need suitable anchor points for the finished arrangement. The description lists indoor and outdoor use, though it does not provide durability details or customer review information. We’d choose these for a ceiling display or costume-adjacent prop, and skip them if our priority is a full haunted-house transformation with surface coverage and layered creepy detail.
Pros:
- Set includes 12 matching witch hats.
- 328 feet of nylon cord supports varied spacing.
- Lightweight Oxford fabric is listed for indoor and outdoor use.
- Hats fold for compact seasonal storage and can also serve as costume props.
Cons:
- Cord must be threaded through every hat before hanging.
- No durability details or customer review information are provided.
- The display creates a specific witch theme rather than broad haunted-house texture.
Best for: Hosts who want a repeated overhead witch-hat display for a ceiling, porch, or party area.
Not ideal for: Decorators seeking broad wall coverage, a webbed haunted look, or a setup that hangs quickly without threading.
Bottom line: We recommend these hats for a coordinated floating display, while shoppers after dense spooky coverage should choose the web set.
“We recommend these hats for a coordinated floating display, while shoppers after dense spooky coverage should choose the web set.”
As an Amazon Associate we earn from qualifying purchases.
Before You Start
Pick one area and a simple theme before buying or making anything. A single scene, such as a haunted hallway, a creepy porch, or a witch’s corner, is easier to arrange than decorations scattered throughout the home. Choose two or three main colors, such as black, orange, and purple, and repeat them across the display.
Measure the area and check the surfaces where decorations will hang. Test removable tape or putty on an inconspicuous spot first, especially on painted walls. Decide where visitors will walk and where lights will plug in or sit. Keep cords out of paths and away from doors that open and close.
Step-by-Step Instructions
Step 1: Choose a display area and theme
Select one visible spot, such as the front door, porch, fireplace, or a living-room corner. Choose a theme that fits the space: a haunted house, a graveyard, a spider’s lair, or a moonlit witch’s room. Write down two or three colors and three main elements you want people to notice, such as a focal prop, hanging shapes, and lighting.
Tip: Use one large focal point instead of many competing centerpieces. A doorway framed with webbing and a large silhouette can read more clearly than a crowded collection of small props.
Check: You can describe the scene in one sentence and know which area will hold the focal point.
Step 2: Clear and measure the space
Move everyday objects out of the display area, then measure its width and height. Mark attachment spots that will not cover switches, vents, door handles, house numbers, or exit signs. For a porch or yard, trace the full walking route from the entrance to the door and keep it clear.
Tip: Photograph the empty area before decorating. The image can help you check spacing and spot anything that needs to stay visible.
Check: The display area is clear, attachment spots are known, and the walking route remains open.
Step 3: Gather materials and prepare decorations
Gather decorations you already own, then buy only the missing items. Collect low-cost materials such as black cardstock, white paper, gauze, tissue paper, yarn, clean jars, and removable tape. Cut simple bat, cat, ghost, or branch silhouettes from cardstock. Make ghosts by draping a small square of white fabric over a lightweight ball of paper and tying the fabric below it. Add faces with paper shapes or washable marker.
Keep each decoration lightweight if you plan to hang it. Use scissors carefully, and round sharp corners on cutouts that will hang at child height.
Tip: Prepare several items in one session and sort them by placement: wall pieces, hanging pieces, tabletop props, and lights.
Check: The decorations are ready to place, and none has a sharp edge, loose pin, or heavy attachment that could fall.
Step 4: Build the largest visual elements first
Position the focal prop at eye level or just below it, where it can be seen from the main approach. Hang larger silhouettes or a backdrop behind it, then arrange medium-sized decorations around the edges. Attach items with painter’s tape, poster putty, or removable hooks suited to the surface. Leave open space around the focal point so its shape stands out.
Tip: Avoid covering glass doors, peepholes, house numbers, or windows used to see outside. Outdoors, attach decorations so wind cannot blow them into a path or onto a road.
Check: The main subject is visible from the entrance or room doorway, and the display has a clear center.
Step 5: Add texture and smaller details
Layer gauze, paper webs, or fabric around the main elements to create depth. Drape material loosely across a corner or shelf, keeping it clear of walkways. Arrange smaller props, such as paper bats, labeled jars, faux bones, or a few artificial leaves, in groups of three or five. Place labels and props where people can see them without bending into the path.
Tip: Use a few repeated shapes and colors. Repetition helps homemade pieces look like part of one scene.
Check: The display has visible foreground and background details, with enough empty space to keep the main shapes readable.
Step 6: Set up safe, spooky lighting
Turn off the room lights or wait until dusk, then inspect where the display needs extra light. Place LED candles inside clean jars, set battery-powered lights behind a prop, or aim a small lamp toward a wall to create shadows. Position lights securely away from paper, fabric, and dry plant material. If you use plug-in lights outdoors, confirm they are rated for outdoor use and keep connections away from standing water.
Tip: Check that people can still see steps, thresholds, and the edge of the path. A spooky display can stay dim while the walking surface remains lit.
Check: The focal point is visible, the route is easy to follow, and no flame or hot bulb sits near decorations.
Step 7: Walk through and adjust the display
View the scene from the street, hallway, or main room entrance. Remove pieces that block the focal point, hang too low, or make the area feel crowded. Walk the full route as a visitor would, checking for loose tape, cords, low branches, unstable props, and decorations that swing into the way. Tug gently on hanging pieces to check that their attachments hold.
Tip: Ask another person to look at the display from the approach. They may spot a blocked house number or a hard-to-see step that you have become used to.
Check: The theme reads at a glance, decorations stay in place, and visitors can enter and leave without moving anything.
Common Mistakes to Avoid
- Adding too many decorations until the display feels cluttered. — Choose one focal point and remove any item that hides it or repeats a detail without adding shape, texture, or color.
- Using tape or putty that pulls paint or leaves residue. — Test the attachment on a hidden area, follow its package directions, and use a surface-safe removable product.
- Letting cords, fabric, or props extend into a walkway. — Keep all decorations within the display footprint and walk the entire route before guests arrive.
- Using real candles near paper, gauze, or dry leaves. — Choose LED candles and battery-powered lights for displays with fabric or paper.
Troubleshooting
Problem: A wall decoration keeps falling.
Solution: Remove the tape, clean and dry the surface, then use a removable hook or putty rated for the decoration’s weight and surface. Use a lighter decoration if it still slips.
Problem: The display looks flat or hard to see.
Solution: Move the focal prop forward, place a light behind or below it, and add one darker or larger shape to create contrast.
Problem: Outdoor decorations shift in wind or rain.
Solution: Bring paper and fabric indoors during poor weather. Secure weather-rated props with stable weights or approved outdoor fasteners, away from paths and drains.
Problem: The area looks too dark for visitors to walk safely.
Solution: Add a steady light to steps and thresholds, then aim colored or lower-level lights at the decorations rather than darkening the whole route.
What Success Looks Like
The finished display has a recognizable Halloween theme, a clear focal point, and details that can be seen from the main approach. Decorations stay attached during a gentle check, lights operate as intended, and visitors can see and use every entrance, step, and walkway without encountering cords, sharp edges, or hanging objects.
Next Steps
Check the display each evening for loose attachments, dead batteries, weather damage, or objects that have shifted into the walking route. After Halloween, remove tape according to its directions, pack reusable pieces in labeled containers, and discard wet or damaged materials. Save a photo and note which pieces worked well so next year’s setup takes less time.
Frequently Asked Questions
How can I make spooky Halloween decor on a small budget?
Reuse jars, sheets, cardboard, paper, and existing lamps. Make cutout silhouettes and simple fabric ghosts, then spend money only on a few durable pieces or LED lights you can use again.
How do I decorate a small apartment without damaging the walls?
Use lightweight paper shapes, freestanding props, and removable hooks or putty approved for the wall finish. Test any adhesive in a hidden spot and keep doors, windows, and shared hallways clear.
What lighting works best for a spooky display?
LED candles and battery-powered string lights work well around paper and fabric. Use a lamp or rated outdoor light to cast shadows, while keeping stairs and walking surfaces clearly visible.
How early should I put up outdoor decorations?
Set up when you have time to secure and inspect each piece, then check the local weather before leaving decorations outside. Bring fragile paper or fabric indoors during rain or strong wind.
How do I keep decorations safe around children and pets?
Keep small pieces, sharp fasteners, cords, and breakable props out of reach. Secure hanging items, avoid loose loops of string, and use cool-running lights instead of open flames.
Fall Picks
fall essentials
As an affiliate, we earn on qualifying purchases.