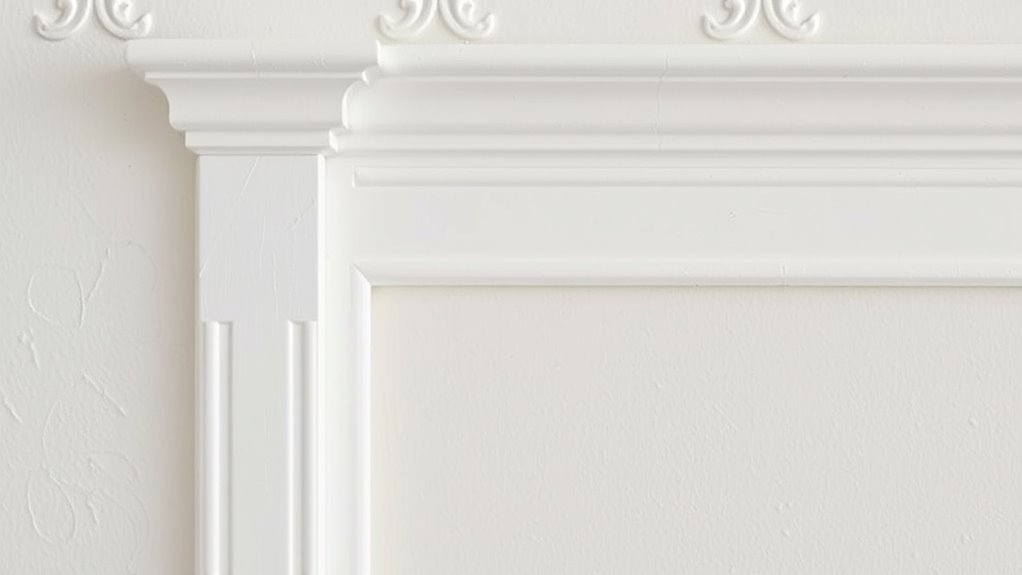
To fake architectural molding with paint tape, start by planning your design and measuring carefully to guarantee straight lines and accurate corners. Apply painter’s tape along your marked lines, pressing firmly for sharp edges. Use precise cuts and align multiple layers if adding depth. Carefully paint over the tape, then remove it once the paint is tacky for a crisp look. With patience and attention to detail, you can create a convincing faux moldings you’ll love—learn more on how to master this technique.
Key Takeaways
- Measure and mark precise lines where the faux molding will appear, using a level for straight, accurate guidelines.
- Apply painter’s tape carefully along marked lines, pressing firmly to ensure sharp, clean borders.
- Create the molding shape by stacking or layering tape, mimicking depth and shadow effects for realism.
- Paint over the taped areas with controlled strokes, blending edges to match the surrounding wall for seamlessness.
- Remove tape while paint is tacky, then touch up any rough edges to achieve a professional, convincing faux molding finish.
Gathering Your Supplies and Planning Your Design

Before you begin creating your faux molding, you need to gather the right supplies and plan your design carefully. Start by choosing your color combinations; contrasting shades can make your faux molding stand out, while monochrome palettes create a subtle effect. Next, select the tape types suited for your project—standard painter’s tape works for straight lines, but you might want delicate painter’s tape for more intricate designs. Measuring and marking your wall is essential, but for now, focus on visualizing your pattern and gathering the necessary supplies. Have your paint, brushes, and tapes ready, and consider sketching your design on paper first. Proper planning guarantees clean lines and a professional look, transforming your space without expensive molding or carpentry skills. Additionally, gathering supplies ensures you have all necessary tools to achieve a polished finish.
Measuring and Marking Your Wall for Precision

Accurate measuring and marking are the foundation of clean, professional-looking faux molding. To guarantee your tape lines are straight and even, start by carefully taking wall measurements. Use a reliable tape measure and double-check each measurement to avoid errors. Mark your points lightly with a pencil, focusing on where the faux molding will sit. Marking accuracy is key—measure multiple times before making any permanent marks. Use a level or a straightedge to connect your marks, creating clear guidelines for taping. Keep your measuring tools steady and your markings consistent. Precise measurements and careful marking prevent crooked lines and uneven faux molding, making the final result look seamless and polished. Taking your time now will pay off with a professional-looking finish. Additionally, understanding the importance of contrast ratio can help you evaluate how well your faux molding will stand out against the wall color, ensuring a striking and cohesive look.
Creating a Base Outline With Painter’S Tape
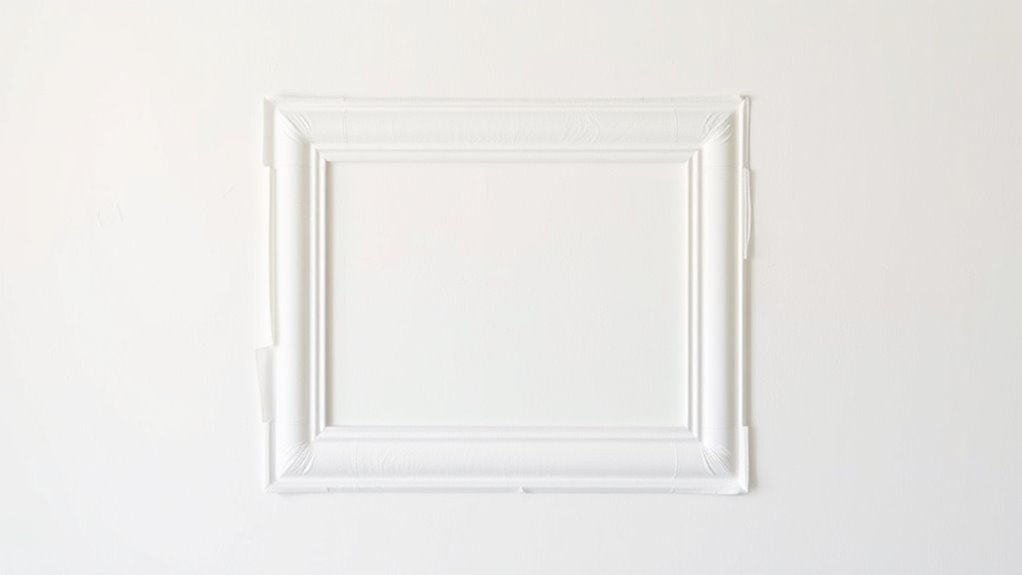
Once you’ve marked your wall, the next step is to create a precise outline for your faux molding using painter’s tape. Choose tape brands like FrogTape or ScotchBlue for clean lines and easy removal. Before applying, decide on your color schemes; using contrasting shades can enhance the illusion of depth. Carefully align the tape along your marked lines, ensuring straight edges by using a level or ruler if needed. Press the tape firmly to prevent paint bleed and maintain crisp borders. Keep the tape flat and smooth against the wall, double-checking the measurements before moving on. This base outline sets the foundation for your faux molding, so take your time to ensure accuracy. Properly taped outlines will make your final paint job look professional and convincing.
Crafting the Molding Details and Corners
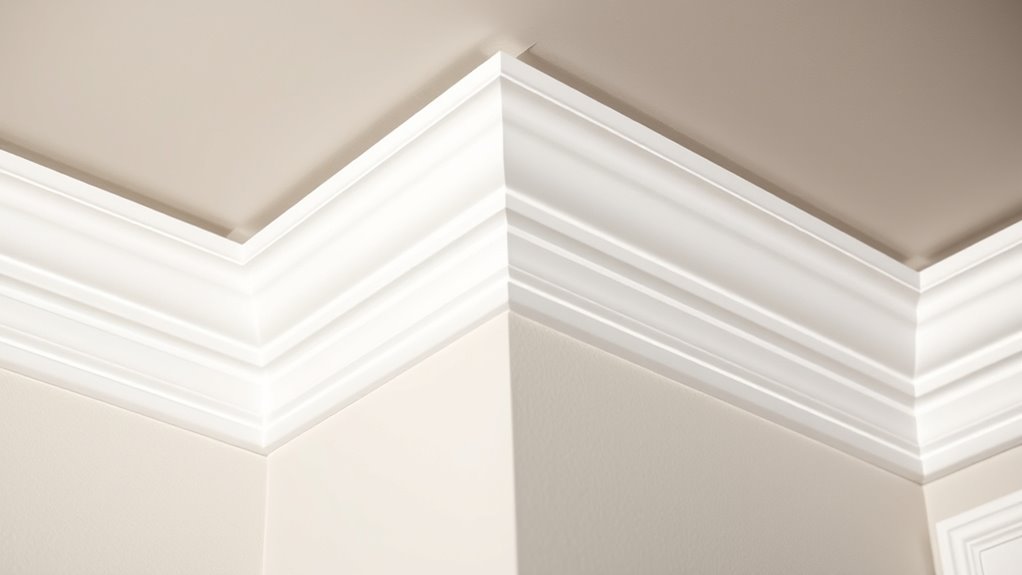
To make your molding look professional, you need to master precise corner techniques that create clean, realistic angles. Align your tape seamlessly at each joint to avoid gaps or overlaps that can give away the fake. With careful attention to detail, your corners will appear seamless and convincingly crafted. Additionally, understanding cultural influences can help you appreciate how different regions interpret traditional decorations, which may inspire more authentic-looking designs.
Precise Corner Techniques
Mastering precise corner techniques is essential for making your faux molding look seamless and realistic. To achieve perfect corner precision, start by carefully aligning your tape at the junction where two walls meet. Use a level or a square to ensure your tape runs straight and accurately follows the corner’s angle. Take your time to press the tape firmly into the edges, preventing any gaps or overlaps that could disrupt the illusion. When cutting tape for corners, make clean, sharp angles that mirror the desired molding profile. Keep your hands steady and double-check your tape alignment before applying paint. These small but critical steps ensure your corners look sharp and professional, elevating the overall authenticity of your faux molding project. Incorporating accurate measurements from the start can also help in achieving a more convincing finished look.
Seamless Tape Alignment
Achieving seamless tape alignment is key to creating realistic molding details and flawless corners. To guarantee pattern consistency, carefully line up each piece of tape before pressing it down. Use a straightedge or level to guide your placement and double-check that the edges align perfectly. When working around corners, overlap tapes slightly and adjust for smooth transitions, avoiding gaps or uneven lines. Consistent tape placement helps maintain the illusion of true molding, so take your time to match patterns precisely. If needed, lightly burnish the tape edges with a fingernail or a scraper to secure the alignment. Proper tape alignment not only enhances the realism of your faux molding but also makes the overall finish look professional and seamless.
Adding Depth With Multiple Tape Layers (Optional)
Adding depth with multiple tape layers can considerably enhance the illusion of real molding. By stacking tape in carefully planned layers, you create layered illusions that add visual depth to your design. This technique works especially well for mimicking intricate details or shadowed edges, making your faux molding appear more three-dimensional. Start with a base layer of tape along your desired line, then add additional layers on top, slightly offset or varied in width, to simulate shadows and depth. Be precise with your placement to maintain clean lines and avoid uneven edges. Using multiple layers tricks the eye into perceiving more dimension, transforming a simple tape outline into a convincing, multi-layered molding effect. It’s an effective way to elevate your project without extra materials or complexity. For a more authentic look, consider Hyundai Tuning techniques that enhance performance and appearance, inspiring you to craft more detailed and dynamic designs.
Removing Tape and Touching Up Edges

Once you’ve finished applying your tape, carefully remove it while the paint is still slightly tacky to prevent peeling or smudging. As you peel back the tape, do it slowly and at a sharp angle to ensure clean edges. This is where edge smoothing becomes essential—if any paint leaks or rough edges appear, use a small brush or a damp cloth to gently tidy up the line. During tape removal, focus on maintaining a steady hand to avoid disturbing the fresh paint. If you notice uneven edges, don’t rush; wait for the paint to dry fully and then touch up with a fine brush. Proper tape removal combined with precise touch-ups results in a seamless, professional-looking molding effect. Incorporating techniques like controlled removal can further enhance the crispness of your finish.
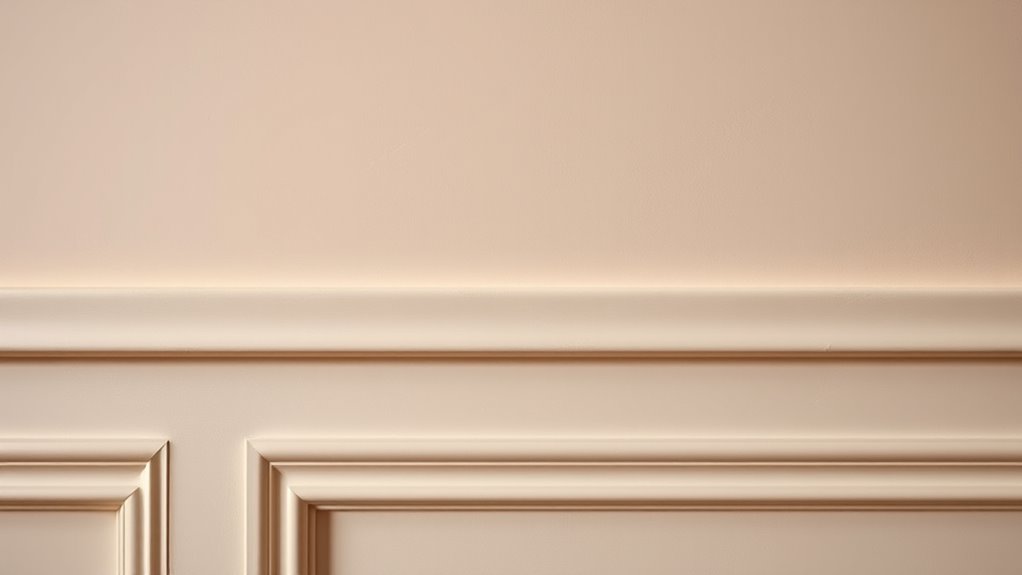
Painting Over the Tape to Complete the Look
When you paint over the tape, focus on creating a seamless application that hides the edges. Use a steady hand and thin coats to avoid drips and uneven lines. This step helps achieve a realistic texture that makes your molding look authentic. Incorporating natural materials and soft colors can further enhance the cottagecore aesthetic, making your space feel cozy and inviting.
Seamless Paint Application
To achieve a polished, seamless look, you need to carefully paint over the tape without leaving any gaps or ridges. Use smooth, controlled strokes to blend the new paint into the surrounding wall, making certain texture blending is consistent. Pay close attention to color coordination; match your paint shade precisely to avoid noticeable progressions. Apply thin coats and let each layer dry thoroughly before adding the next, which helps prevent drips and unevenness. Keep your brush or roller steady along the tape line to maintain clean edges. If you notice any slight gaps or ridges, gently feather the paint with a dry brush for a seamless shift. This careful technique ensures your faux molding looks professional and realistic, with no visible seams or inconsistencies. Additionally, maintaining a steady hand and patience during application will significantly enhance the overall clutter-free aesthetic of your faux molding project.
Achieving Realistic Texture
Achieving a realistic texture when painting over tape is essential for convincing faux molding. To enhance the faux finish, use techniques that add depth, such as dry brushing or stippling, to mimic intricate details. Select paint colors that imitate natural shadows and highlights, creating a more authentic look. Layering different shades can give your surface a textured appearance, making the molding seem three-dimensional. Incorporate subtle variations in tone to avoid a flat, uniform look. When applying paint, use a brush or sponge to gently add texture, enhancing realism. Remember, the goal is to create visual interest that tricks the eye into perceiving real architectural molding. Practicing visualization techniques can help you better imagine the finished effect and guide your process. With careful technique, your painted surface will showcase convincing texture enhancement, elevating your faux finish to professional quality.
Final Tips for Maintaining Your Faux Molding Effect

Maintaining the illusion of your faux molding requires regular care to keep it looking its best. To preserve its realism, focus on maintaining texture variety; avoid uniformity that can make it appear flat or fake. Gently dust and wipe the tape edges with a soft cloth to prevent dirt buildup, which can dull the effect. Additionally, pay attention to color coordination—touch up any chipped paint or fading spots promptly to keep the design cohesive. If you notice the tape peeling or lifting, reapply or reinforce the edges with a small amount of matching paint or a touch of clear sealant. Regularly inspecting and maintaining your faux molding can help prevent damage from wear and tear, ensuring the visual appeal remains intact. Consistent upkeep ensures your faux molding remains convincing, vibrant, and seamless, giving your space a polished and professional appearance.
Frequently Asked Questions
Can I Create This Faux Molding on Textured or Uneven Walls?
You can create faux molding on textured or uneven walls, but wall texture may affect tape adhesion. To guarantee clean lines, smooth out the surface as much as possible or use a flexible painter’s tape designed for textured surfaces. Press the tape firmly into the wall to prevent paint bleed, and consider applying a primer if the texture is very rough. Proper preparation helps achieve a polished faux molding look regardless of wall texture.
What Paint Types Work Best for Faux Molding With Tape?
For faux molding with tape, you’ll want to choose paint types that offer good paint adhesion and tape compatibility. Latex or acrylic paints work best because they stick well to surfaces and peel away cleanly without damaging the tape or wall. Avoid oil-based paints, as they may cause issues with tape adherence and removal. Test your paint and tape combination on a small area first to guarantee clean lines and easy removal.
How Long Does the Tape Need to Stay Before Painting?
You should let the tape dry for at least 24 hours before painting to guarantee proper drying time. This allows the tape’s adhesive to set, preventing smudges or peeling during paint application. Once the paint is dry, carefully remove the tape to reveal clean, crisp faux molding lines. Rushing tape removal can damage your design, so patience guarantees a professional look and a smooth finish.
Is This Method Suitable for Outdoor Walls or Only Indoor?
You’re wondering if this paint tape technique works outdoors. While it’s great indoors, it’s not ideal for outdoor walls because of outdoor durability and weather resistance. Outdoor conditions like rain, sun, and wind can cause the tape to peel or fade quickly, ruining your faux molding. For outdoor projects, consider weatherproof materials or specialized outdoor paint products to guarantee your design lasts and stays looking sharp over time.
How Durable Is the Faux Molding Over Time?
Think of your faux molding as a delicate dance—its durability depends on your preparation. With proper surface prep and good paint adhesion, it can last for years, resisting peeling or cracking. However, if the surface isn’t clean or the paint isn’t suited for the environment, it may fade or chip over time. Regular touch-ups and careful maintenance keep your faux molding looking fresh and vibrant, standing strong through the seasons.
Conclusion
With a little patience and your creative touch, you can effortlessly elevate your space without the hassle of real molding. Think of this as a gentle dance between design and simplicity—offering a charming illusion that’s both budget-friendly and stylish. So, trust your eye, enjoy the process, and embrace the subtle elegance you’re about to reveal. Before long, your room will feel thoughtfully refined, all thanks to your clever use of paint tape.