
TL;DR
The most effective way to quiet your rig isn’t just foam—it’s moving it away or sealing it well. Proper placement, treating reflection points, and ventilating a closet rig turn a noisy space into a silent powerhouse, especially when you focus on soundproofing and airflow.
Ever feel like your closet sounds like a roaring beast every time you fire up that high-power AI rig? You’re not imagining it. Noise isn’t just a bother; it’s a signal of how much heat and sound your machine pushes out. But here’s the kicker: the best way to tame noise isn’t just slapping foam on the walls. It’s about smart placement and understanding how sound moves.
If you want your workspace to stay serene while your rig roars in the background, this guide will show you how. From the power of distancing to clever treatment inside tiny spaces, you’ll learn the secrets to making your closet rig quiet, cool, and perfectly functional for voice work, coding, or AI experiments.
Acoustic dampening
& the rig in the closet.
The most powerful noise fix isn’t a material — it’s a floor plan. A rig you can’t hear because it’s in another room beats any amount of foam. Tap the approaches in Part 1 to see what actually works.
(another room)
(levers 1–4)
(door / barrier)
(acoustic foam)
Contain the noise, not the heat
Key Takeaways
- Distance your rig or move it into another room whenever possible. It’s the most effective noise reduction technique.
- Proper ventilation is critical if you place a rig inside a sealed closet or cabinet. Active airflow prevents overheating and throttling.
- Focus treatment on reflection points—especially behind your mic and at ear level—to cut echo and boxiness.
- Seal all gaps in doors, vents, and around panels to prevent sound leaks and maintain isolation.
- Bass trapping in corners makes a noticeable difference in small rooms, reducing muddiness and boominess.

72in 3-Panel Soundproof Room Divider with Wheels, Heavy-Duty Acoustic Partition Temporary Wall for Noise Reduction, Portable Divider for Home Hospital Library Classroom - Light Grey
【Noise Reduction】Our room divider can absorb at least 85% of the noise, creating a quiet environment without being...
As an affiliate, we earn on qualifying purchases.
As an affiliate, we earn on qualifying purchases.
Why Placement Is the First and Most Critical Step
Starting with where your rig sits makes all the difference. Think of it like a loud speaker—you can’t just put it anywhere and expect good sound. Moving your machine into another room or behind a wall is the single biggest fix. When it’s far away, it’s like turning down the volume without touching a knob.
For example, I set up my GPU rig in the basement, away from my main workspace. The difference? I barely hear it now, even during intense training sessions. The noise is effectively off my radar because it’s in another room, connected via a fast Ethernet cable. No amount of foam can beat that.
This approach is perfect for AI rigs, which are often networked. You can SSH into your machine or use remote APIs, so the physical location becomes irrelevant. The key is strong wired connections and good ventilation where it’s stored.

Focusound 52 Pack Acoustic Foam Panels 1" x 12" x 12" Sound Proof Foam Panles Soundproofing Noise Cancelling Wedge Panels for Home Office Recoding Studio with 300PCS Double-Side Adhesive
Soundproofing - Acoustic foam panels triangular grooves structure for better noise absorption, helps to reduce and absorb unwanted...
As an affiliate, we earn on qualifying purchases.
As an affiliate, we earn on qualifying purchases.
The 'Rig in the Closet' Setup — Why It Works and What to Watch For
Placing your noisy rig inside a closet or cabinet is a classic move. It’s like hiding the beast behind a door—soundproofing the space itself. But the big trap? Heat. A sealed closet traps hot air, turning your quiet workspace into a sauna that cooks your gear. For more on this, see Acoustic Dampening, Placement, and the "Rig in the Closet" Setup.
Imagine stacking a 600W GPU inside a small closet with no ventilation. The temperature climbs rapidly—within an hour, your machine throttles, fans scream, and noise defeats the purpose. That’s why ventilation isn’t optional; it’s mandatory.
To make this work, add active ventilation—cooling fans with ducting, or at least passive vents. Consider a purpose-built soundproof cabinet with built-in fans and insulation, which balances noise suppression with heat dissipation. You can find these on the market or DIY your own with a sealed box, acoustic foam, and a small exhaust fan. Check out this guide for detailed airflow tips.
Understanding this tradeoff is crucial: without proper ventilation, your efforts at soundproofing can backfire by overheating your hardware, potentially causing thermal throttling or damage. The goal is to strike a balance—block noise while ensuring adequate airflow. This often means sacrificing some degree of soundproofing for better heat dissipation, or investing in advanced solutions like active cooling systems integrated into your enclosure.
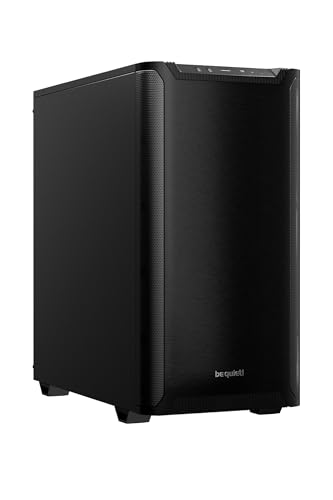
be quiet! Pure Base 501 Black ATX Case | 2 Preinstalled Pure Wings 3 140mm PWM Fans | Optimized Air Pressure | Compact PC Case | Vertical GPU Installation | USB 3.2 Gen. 2 Type C | BG073
Without any distractions, Pure Base 501 is reduced to excel at its core functions and is aimed at...
As an affiliate, we earn on qualifying purchases.
As an affiliate, we earn on qualifying purchases.
How to Properly Treat Reflection Points Inside a Closet
Acoustic dampening isn’t just about slapping foam everywhere; it’s about where you place it. The first step is identifying reflection points—places where sound bounces directly into your mic or ear.
For a closet, focus on the wall behind your mic and the side walls at mouth height. Use thick panels or blankets at these points. For example, if you’re recording vocals, put a foam panel at your mouth level and behind your head. This dramatically reduces echo and boxiness.
According to acoustic panel placement tips, covering 20-30% of the reflective surfaces can cut reverberation noticeably. In tight spaces, layering blankets over panels or using thicker, dense foam helps tame reflections better.
Deeply understanding reflection points is essential because unaddressed reflections can cause comb filtering and muddiness, degrading sound clarity. Proper placement of dampening materials at these key points ensures that sound waves are absorbed or diffused before bouncing into your microphone, resulting in cleaner recordings and more accurate sound reproduction. This targeted approach maximizes your treatment efficiency, especially in constrained spaces where every bit of sound control matters.
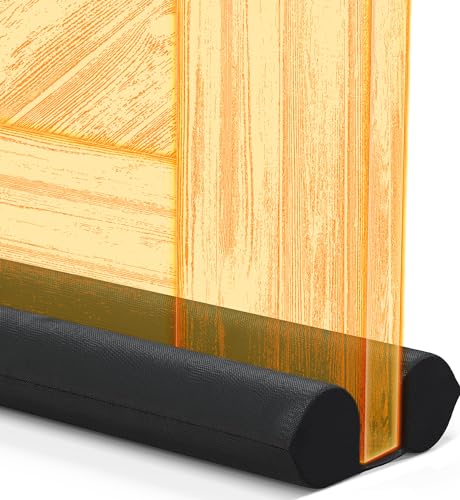
Everlasting Comfort 2 Sided Door Draft Stopper for Bottom of Door - Keeps Cold Air in & Heat Out, 100% Sound Proofing Strip Gap Filler, Quick Install Noise Blocker Sweep for Home - Fits 30"- 36" W
QUICK AND EASY INSTALL: Ideal for doors 30" to 36" wide. Install in a few easy steps -...
As an affiliate, we earn on qualifying purchases.
As an affiliate, we earn on qualifying purchases.
Sealing Gaps and Doors: The Unsung Heroes of Quiet Space
Small gaps in doors, windows, or vents are like open windows for sound to escape or enter. Sealing these with weatherstripping, acoustic sealant, or draft stoppers makes a huge difference.
In my setup, sealing the closet door with weatherstripping cut the noise leak by nearly 50%. Plus, adding a door sweep helps prevent sound from sneaking underneath. For critical spaces, use acoustic door seals or even a heavy blanket draped over the door for quick, budget-friendly results.
Remember, soundproofing is all about creating a barrier. Even tiny cracks undermine your entire effort—so spend a few minutes sealing every gap. This not only improves sound isolation but also prevents air leaks that can cause temperature fluctuations, which is especially important if your rig generates a lot of heat. Combining sealing with insulation and proper ventilation ensures a more robust, effective soundproofed environment that maintains both quiet and safe operating temperatures.
Corners, Bass Traps, and Handling Low Frequencies in Small Rooms
Low frequencies are the trickiest part of sound treatment—especially in small spaces like closets. Bass tends to concentrate in corners, creating that boomy, boxy sound. Addressing these with bass traps or corner panels can make your recordings clearer.
In a tiny closet, placing foam bass traps in corners or using thick blankets wrapped around the edges reduces muddiness. For example, I added a DIY bass trap in my closet corner, and the difference in vocal clarity was astonishing.
Experts recommend at least 10-15% coverage of bass trapping in small rooms. It’s a small investment that kills the 'thump' and lets your voice shine. Proper bass trapping reduces the buildup of standing waves and minimizes low-end resonances, which can otherwise make recordings sound muffled or boomy. For more on handling low frequencies, see this guide.In tight spaces, even modest bass trapping can dramatically improve clarity and tonal balance across your entire frequency spectrum, ensuring your voice or audio source is represented accurately without unnatural coloration.
Floor, Ceiling, and the Hidden Reflection Points
Hard surfaces like floors and ceilings bounce sound around, creating harsh reflections that muddy your recordings. Covering these with rugs, carpets, or ceiling panels helps soften the sound.
For example, a thick rug in front of my closet booth reduced echo and made my voice sound warmer. Ceiling treatment, like hanging acoustic panels or even a dense fabric, further reduces harshness.
Sealing gaps around the door frame and adding soft materials on the floor and ceiling completes the circle of reflection control.
Addressing these reflection points is vital because reflections from hard surfaces can cause comb filtering and phase issues, leading to a less clear and more confusing sound. Softening or diffusing these surfaces prevents sound waves from bouncing unpredictably, creating a more controlled and natural acoustic environment. This holistic approach ensures that all potential reflection points are managed, which is especially critical in small, enclosed spaces where sound energy has nowhere to go.
Quick Tips for DIY and Budget-Friendly Sound Treatment
- Use heavy blankets or moving pads to cover walls and door gaps.
- Place thick rugs on the floor to reduce bouncing reflections.
- Seal every crack around the door and window with weatherstripping or acoustic caulk.
- Mount DIY bass traps in corners using foam or wrapped insulation.
- Build a simple vented box or use a commercial soundproof enclosure for your rig if heat is a concern.
Frequently Asked Questions
Is foam enough to soundproof a closet for recording?
Foam absorbs reflections but does little to block sound transmission. For true soundproofing, sealing gaps, adding mass, and using barriers are necessary. Foam alone won't stop noise leaks or structure-borne sound.How many acoustic panels do I need in a small closet?
Aim for covering about 20-30% of the wall surfaces, focusing on reflection points. In a tiny space, layering blankets and panels in corners and around the mic can give better results than just a few panels.What’s the best way to prevent sound from leaking through a closet door?
Seal gaps with weatherstripping or acoustic door seals, and consider hanging a heavy blanket over the door for quick results. For serious isolation, use a solid-core door with proper seals or install a soundproof door.Do I need bass traps in my tiny closet?
Yes, especially in corners. Bass tends to accumulate there, causing muddiness. Small, DIY bass traps or thick panels can improve clarity in voice recordings and reduce boomy sounds.Should I treat the ceiling and floor too?
Absolutely. Hard floors and ceilings bounce sound, creating harsh reflections. Rugs, ceiling panels, or hanging fabrics help tame these and improve overall sound quality.Conclusion
When it comes to noise and sound quality in a tiny space, placement and proper treatment beat foam every time. Moving your rig into a closet or another room and sealing gaps creates a quiet, professional environment. The secret lies in understanding sound’s journey and controlling it at every step.
Think of your closet as a blank canvas—treat it right, and it becomes a perfect little studio. Your voice, your AI, and your peace of mind all benefit. Now, go build a space where silence and clarity reign supreme.